
Share my Invoice
Share my Invoice
The Share Invoice feature in BridgeLCS allows you to easily share invoices within the platform. However, for a smooth and seamless exchange, the other company must also use BridgeLCS. This ensures both parties can send and receive invoices efficiently.
Step 1: Create a Customer Profile
- Navigate to the Customers Module →Customers.
- Click New Customer to add a new profile.
Fill in the required details:
- Customer Name
- Tax Number (mandatory for sharing invoices)
- Other necessary information.
- Click Save to complete the customer profile creation.
Step 2: Accept Terms and Conditions for Share Invoice Feature
- Go to the BridgeSpotlight Module and select Share My Invoice.
- A pop-up will display the Terms and Conditions for using the Share Invoice feature.
- Review and accept the terms to proceed. This step ensures compliance and grants access to the feature.

Step 3: Generate and Share an Invoice
- Navigate to the Operations Module → Invoice.
- Generate an invoice for the newly created customer.
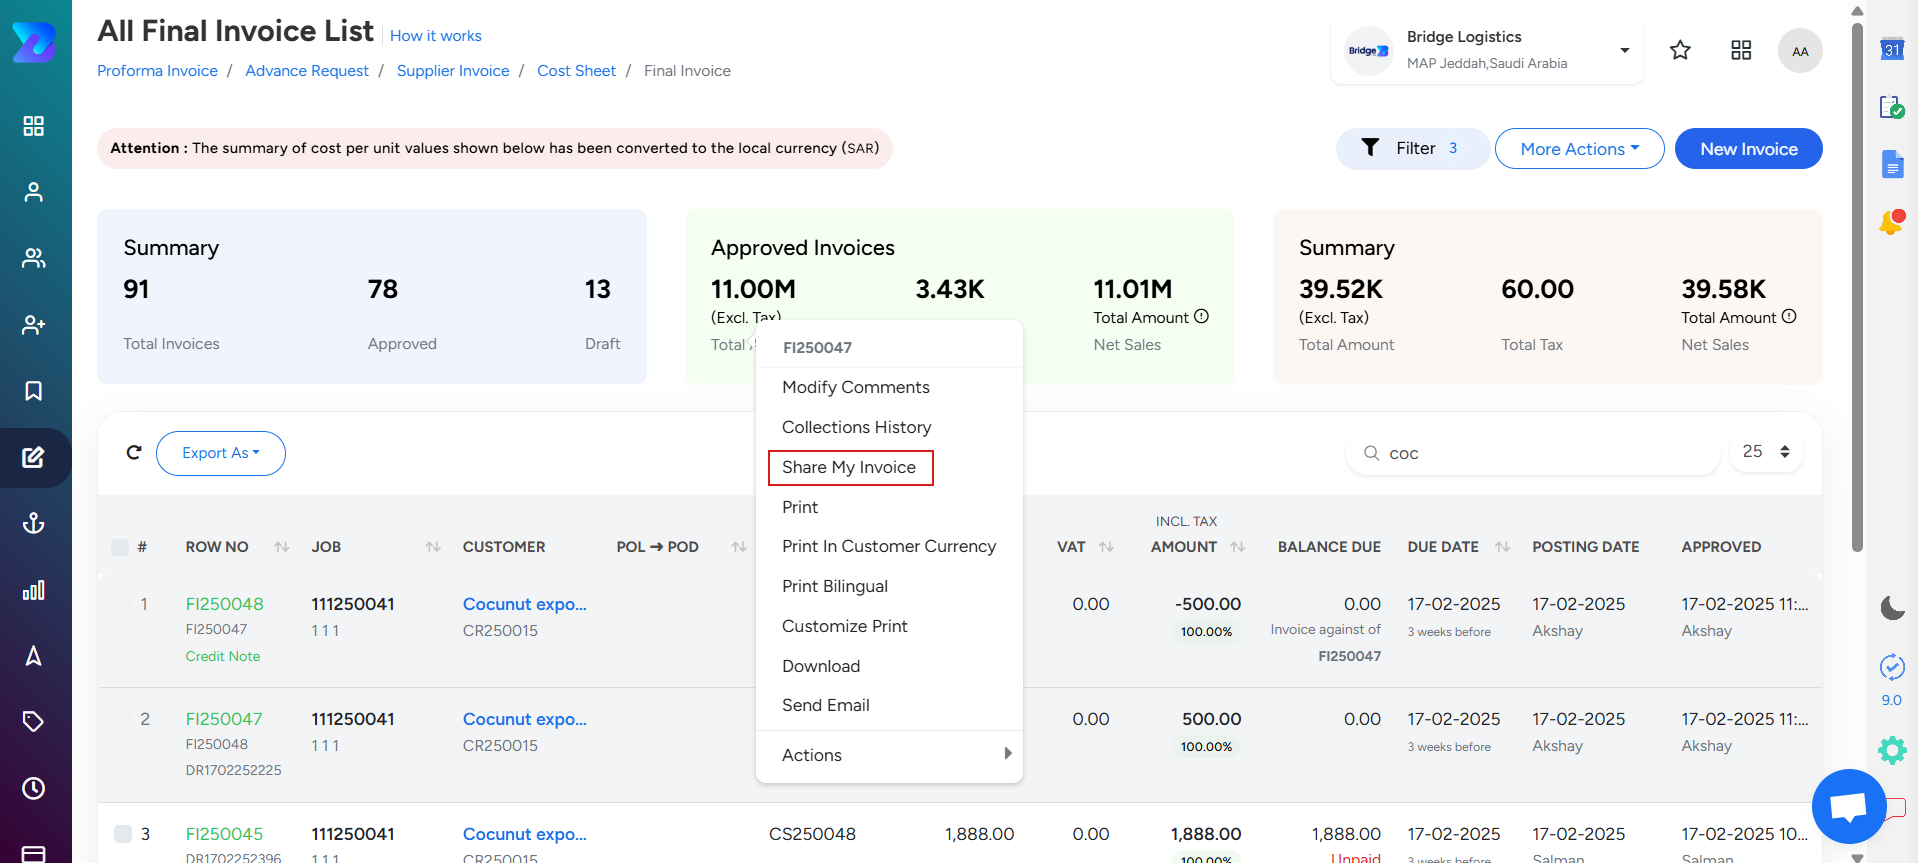
- Right-click on the specific final invoice you want to share.
- Select Share My Invoice from the menu.
- A confirmation pop-up will appear. Click Share my invoice to send the invoice to the customer.
Step 4: Manage Shared Invoices
Go to the BridgeSpotlight Module and select Share My Invoice. You will see four tabs:
1. Shared from Others
- This tab acts as an inbox for invoices sent to your company by other BridgeLCS users.
- Details displayed include:
- From,Invoice Number,Invoice Amount,Invoice Date, Actions (Convert to Invoice or Skip), Download as PDF option.
To process an invoice:
- Click Convert to Invoice.
- A Supplier Invoice Window will pop up.
- Review the details and click Save to complete the process.
- The invoice will move to the Completed Tab.
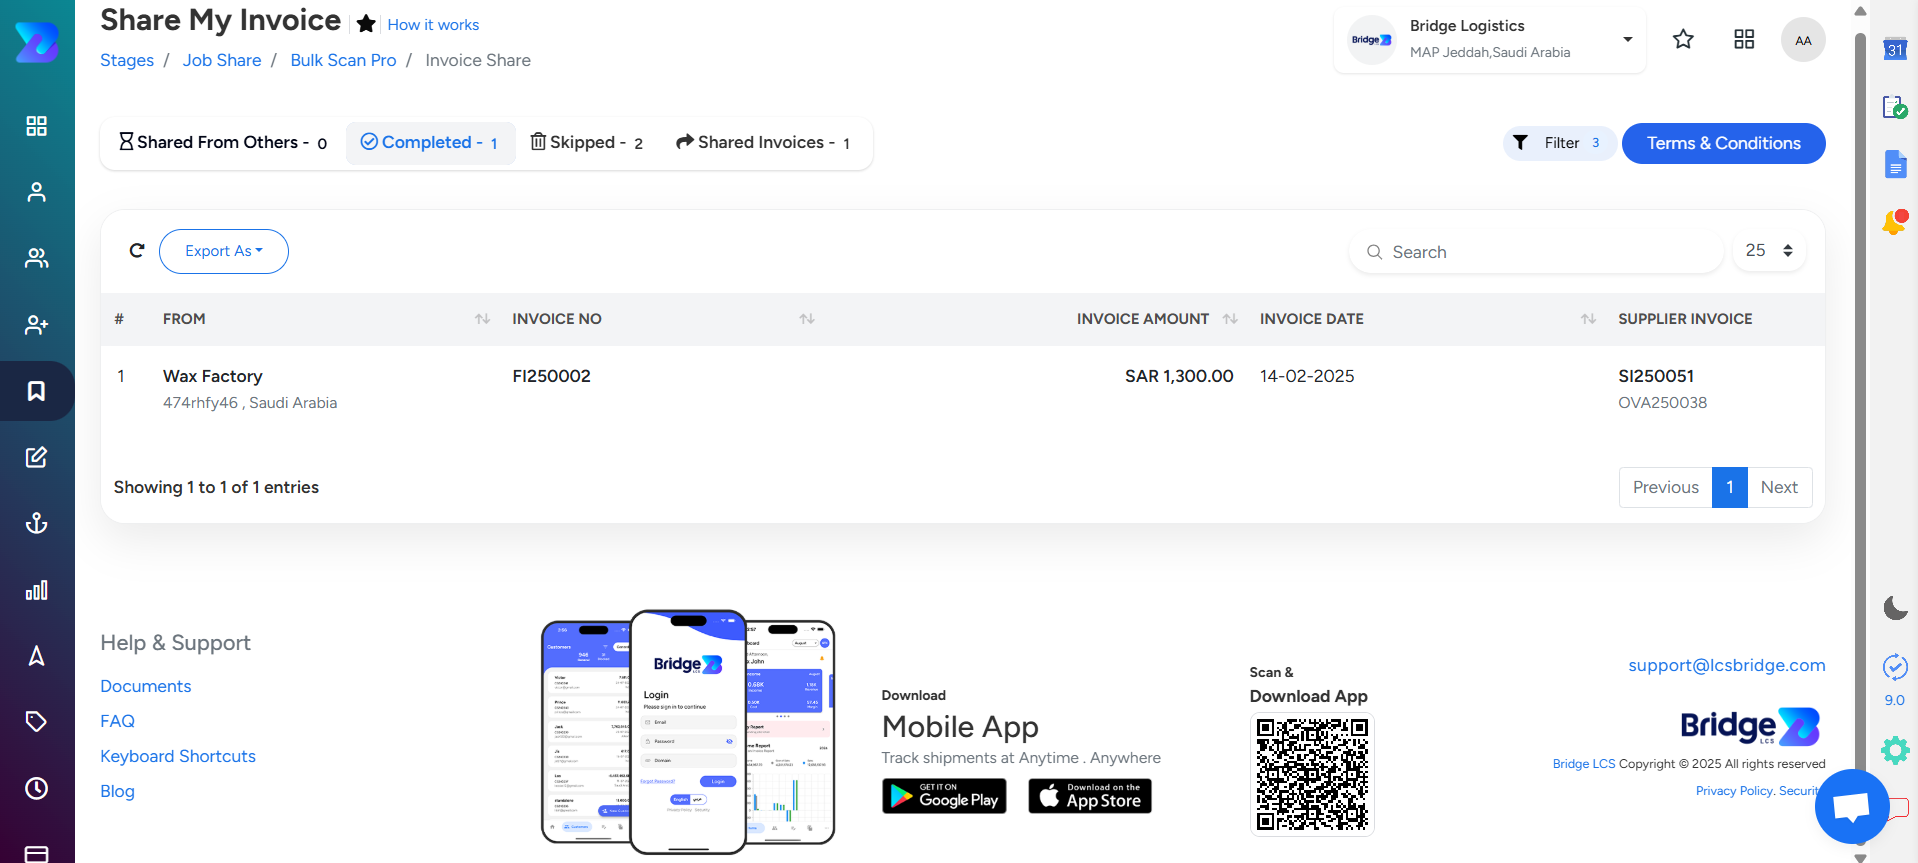
2. Completed Tab:
- Displays all invoices that have been fully processed.
- Serves as a record of completed transactions for easy reference and tracking.
3. Skipped Tab
- Invoices moved here are those you chose to Skip instead of processing or converting.
4. Shared Invoices Tab:
The Shared Invoices tab displays all invoices that have been shared with others. It also includes an option to view the invoice, allowing you to navigate directly to the print page for quick access.
- The VAT number of the customer should be recorded in the system inorder to share the invoice.
- The Export As feature allows users to copy and to export the list in CSV and Excel.
Updated on: 14/03/2025
Thank you!